
 en
en
 Deutsch
 French
 Russian
 Spanish
 Portugues
 Japanese
 Korean
 Turkey
 Italy
Italy Poland
 Indonesia
 Arabic
 India
India Thailand
 Malaysia
 Filipino
 China
China Taiwan
 Vietnam
 Netherlands
 Sweden
 Norway
 Denmark
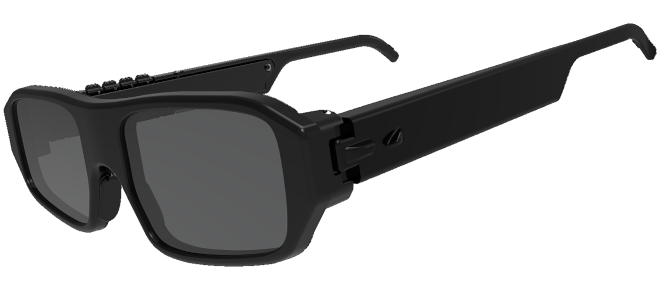
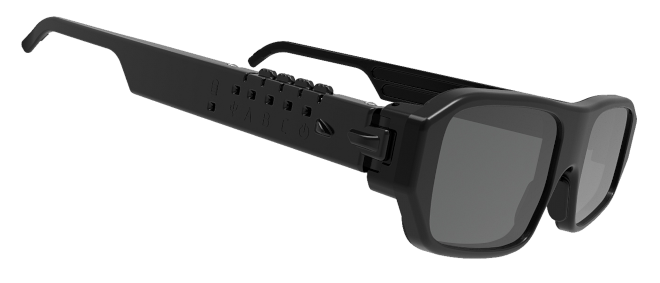
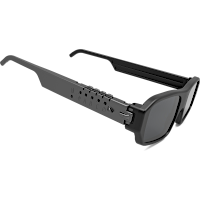
3D Glasses for PC and Smartphone
Enjoy 3D movies and play 3D games. The glasses are compatible with a wide range of computers and laptops. Our unique software delivers nice image quality for a truly immersive experience. Glasses are fully compatible with NVIDIA 3D Vision for PC gaming.Key Benefits
You don't need to buy expensive equipment to enjoy 3D. Our solution provides sufficiently high image quality with minimal costs. Flexible software automatically adjusts your computer’s parameters to achieve the best possible 3D image quality. The glasses operate across a wide range of frame rates and are compatible with many modern displays. Built-in firmware maintain image stability even during partial synchronization loss.
Quality
Experience true 3D the way it was meant to be seen. For crisp, immersive stereoscopic visuals, use 3D glasses with a large PC display have stunning depth and clarity. Unlike VR headsets, which place the screen too close to your eyes, professional 3D movies are designed for wide screens, just like in the IMAX cinema. That’s why 3D looks dramatically better on a proper display than in any VR device.
Comfort
The glasses are lightweight and comfortable. Try wearing a heavy VR headset for a couple of hours - you'll immediately feel the difference. Glasses use bluetooth automatic selection of connection channels, allowing up to 40 PCs to display 3D in the same room without interference - perfect for use in a game centers.
Watch 3D photos and 3D movies
If you don't have a 3D TV or an IMAX theater not too far away, don't feel bad. You too will be able to enjoy the novelties. Connect the glasses to computer, download the movie by links below..
Open the photo gallery:
Asakusa Japan
Guandu Temple
Fuji Japan
Facebook 3D groups:
LA 3D Club
Convert 2D To 3D
Stereoscopic 3D AI ART
Stereo 3D Photo Fan Club
Download Free 3D video:
Youtube 3D Side By Side
3D Movies Club
3D Blu-ray store
3D Cinema Theatre (ru)
3D online Films
Best 3D Movies
The 3D TOR
AVS 3D Content
3D Movie List
Sale, Buy 3D video:
3D-HD CLUB Lots of options
3D Blu-ray Collectors Buy & Sell
3D World of Uncle Huey
3D Blu-ray, Films and Game
3D Eyes Popper
3-D Film Archive
3D movies


Make 3D Show Yourself
Convert any photo or video into stunning 3D content using professional software or online services, and enjoy immersive 3D playback. This approach unlocks a whole new way to experience your media. A wide range of solutions is available - from free tools to premium, high-quality converters. You can find a list of recommended converters under the spoiler. For best results, we recommend reviewing the documentation and usage guidelines of each tool. Conversion settings depend on many factors, including screen size, viewing distance, and display characteristics.Creating high-quality 3D visuals requires careful tuning and attention to detail. To ensure a comfortable and engaging viewing experience, avoid excessive depth - well-balanced 3D always looks more natural and appealing.
2D to 3D convertors:
IW3 AI based. The Best and Free!
Vid23D
OWL3D
DepthMaker for Android
Ani3D
Xilisoft 3D Video Converter
Tipard 3D Converter
2D to 3D Conversion Service
Immersive Tools
3D DepthR Map Creator
SBS 2D-To-3D Converter
3D COMBINE Converter
IW3 AI based. The Best and Free!
Vid23D
OWL3D
DepthMaker for Android
Ani3D
Xilisoft 3D Video Converter
Tipard 3D Converter
2D to 3D Conversion Service
Immersive Tools
3D DepthR Map Creator
SBS 2D-To-3D Converter
3D COMBINE Converter
Play 3D games on your computer
The our glasses are directly compatible with the original NVIDIA 3D vision driver. This allows you to support existing 3D games without upgrading them. Use our S3D USB Emitter for replace the NVIDIA "3D pyramid".
Enjoy over 600 games in 3D
Check out the list of compatible games. You'll find a game to suit every taste. The SUPPORT spoiler provides assistance with adapting your equipment. Please review the graphics card and display requirements carefully. Not all hardware is compatible.Compatible Games
3D Game Data Base


1. Connect the
S3D Emitter
2. Download the 3D Fix Manager
3. Replace NVIDIA 3D Vision driver.
4. Tune display and glasses.
5. Install and configure game.
Howto: Games Guide
Howto: Integration with NVIDIA
Howto: Integration with GEO11
Howto: Integration with WibbleWobble
Have fun a game!
2. Download the 3D Fix Manager
3. Replace NVIDIA 3D Vision driver.
4. Tune display and glasses.
5. Install and configure game.
Howto: Games Guide
Howto: Integration with NVIDIA
Howto: Integration with GEO11
Howto: Integration with WibbleWobble
Have fun a game!

Connecting Glasses
Requirements for your equipment:
Connecting to a computer or laptop:
1. Install the USB driver
2. Install the S3D Player
3. Press "Settings" button for open setup
4. Configure: "Display 3D customization"
5. Adjust glasses: "S3D Glasses"
6. Download 3D photo
7. Install 3D games
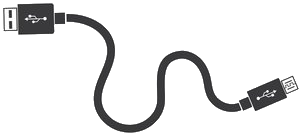
1. Via USB cable
Connect the glasses to the PC via USB cable. Press any button on the glasses to wake up. Only for 3D movies and photos.
2. Bluetooth USB
Attach the BT USB dongle to the computer. Enable dongle support in the 3SD Player. Press any button on the glasses to connect. Only for 3D movies and photos.
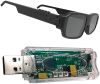
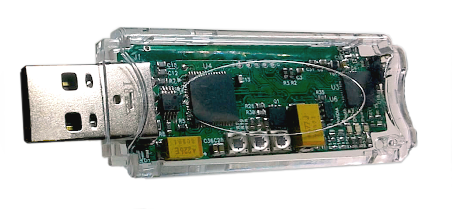
3. S3D Emitter
Attach the USB Emitter to the computer. Select the Emitter support in the 3SD Player. Press any button on the glasses to connect. Full 3D support: games, movie, photo.
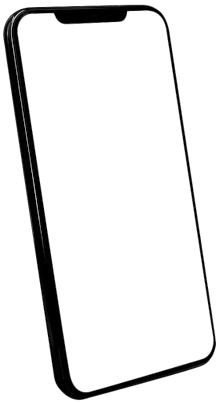
Connecting to an Android smartphone:
This mode enables 3D viewing on your smartphone, like a mini IMAX cinema, right on your phone screen. Turn on Bluetooth on your phone and plug in the glasses. To watch 3D movies, you’ll also need download the 3D player for Android. (This option under development)
Regarding Apple devices
We will not support any Apple devices due to the company's hostile policy attitude towards softwares creators. Let them write it for themselves on their own, sorry...
| Display Frame Rate | More than 90 FPS (Hz) |
| Display Polarisation | 0/45 degr |
| Graphic Driver | OpenGL 4.6 |
| Operation system | Windows: 10..11 |
1. Install the USB driver
2. Install the S3D Player
3. Press "Settings" button for open setup
4. Configure: "Display 3D customization"
5. Adjust glasses: "S3D Glasses"
6. Download 3D photo
7. Install 3D games
1. Via USB cable
Connect the glasses to the PC via USB cable. Press any button on the glasses to wake up. Only for 3D movies and photos.

|
|
|
2. Bluetooth USB
Attach the BT USB dongle to the computer. Enable dongle support in the 3SD Player. Press any button on the glasses to connect. Only for 3D movies and photos.
|
|

|

|

|
|
BT USB Dongle |
3. S3D Emitter
Attach the USB Emitter to the computer. Select the Emitter support in the 3SD Player. Press any button on the glasses to connect. Full 3D support: games, movie, photo.
|
|
|
|
|
|
S3D USB Emitter |
Connecting to an Android smartphone:
This mode enables 3D viewing on your smartphone, like a mini IMAX cinema, right on your phone screen. Turn on Bluetooth on your phone and plug in the glasses. To watch 3D movies, you’ll also need download the 3D player for Android. (This option under development)
|
|
|
Regarding Apple devices
We will not support any Apple devices due to the company's hostile policy attitude towards softwares creators. Let them write it for themselves on their own, sorry...
You can purchase our S3D KIT at a discount: Emitter + Glasses.
This kit will be ready to use immediately.

3D Players
Try S3D Player it show 3D content in side-by-side (SBS)
format without requiring the NVIDIA stereoscopic driver.
You can configure your system for 3D and achieve maximum
image quality. After tuning your hardware, you can try other
video players. For example, NVIDIA 3D Vision Video Player
works very well. However, these players require the
NVIDIA 3D Vision driver to be installed and will refuse
to run in 3D mode on newer GPUs cards beyond the RTX 30 series.
This problem is described in detail in the gamers section.

Compatible displays
The our glasses do not fit all displays.
To understand compatibility, you should do some checks on your equipment and measure the polarization angle of the display. We manufacture 2 models of glasses lenses. With standard polarization: +45 degrees and modified: 0 degrees, like NVIDIA glasses. Make the right choice when ordering.
Measure polarization
Generally, technically competent display companies make the polarization of their screens vertical or equal to +45 degrees. This improves the viewing quality of the image. But this rule is not observed during screen manufacturing. To measure the polarization angle of your screen use a simple tester: Polarizer Tester
Check pixels speed
You should then find the technical description of your display. Check the parameter: pixel on/off time. This time should be short as possible and not worse than 1-2ms. If it is longer, halos will appear around bright parts of the image, because the pixels will not have time to fade out during frame changes. See the technical explanation of the effect of slow pixel switching for different displays.
What is pixels response time
Best Monitors: 120Hz, 144Hz, 240Hz
For example, matching the screen polarisation of laptop Razer Blade: v15, v16, v17 is +45 degrees and 100% perfect. The LG 27GK750F game display (0 degrees), the match is 75%. For this display, should be ordered glasses with 0-degree lenses. Further information can be found in the section: Choose Display
Check video card driver
Driver softwares should support enabling vertical synchronization to display video evenly, without speed bumps. Accordingly, the PC video card must provide the necessary performance and FPS, so that there were no freezes and frame jumps.

Technical Parameters
Glasses hardware:
Glasses images:


To device Wake up, press button "Power" or "A".
To turn Power down, press and hold the button "Power"
To activate Bluetooth short press "Power"
Quick settings management.
1. To switch the 3D perspective R/L short press "Power"
2. To Pause/Continue press button "A"
3. To adjust the Offset-, press button "B"
4. To adjust the Offset+, press button "C"

| Frame Rates | 50.. 255 FPS (Hz) |
| Display method | Switching SBS |
| Connection | USB, Bluetooth LE |
| Lens Polarizations | +45 degrees, 0 degrees |
| Lens Transmittance | 38 % |
| Lens Crosstalk | 0.25 % (L/R) |
| Contrast Ratio | 1200:1 (On/Off) |
| Power Source | 5V USB |
| USB Connector | USB2 Micro-B |
| Battery | LiPo 3.6V 55mA/h |
| Charging time | 1... 2 hours |
| Continuous work | 4 hours |
| Operation system | Windows, Android |


Controls
The glasses have 4 control buttons.To device Wake up, press button "Power" or "A".
To turn Power down, press and hold the button "Power"
To activate Bluetooth short press "Power"
Quick settings management.
1. To switch the 3D perspective R/L short press "Power"
2. To Pause/Continue press button "A"
3. To adjust the Offset-, press button "B"
4. To adjust the Offset+, press button "C"
Quick Start
To quickly connect and configure the glasses, follow these steps:1. As described above, install the drivers and update the firmware.
2. Launch the player application, resize its window to approximately one-quarter of your screen, and start the image slideshow.
3. Open the 3D settings panel. Depending on your preferred connection method, select and activate the appropriate communication interface:
• If you're connecting via a USB dongle, ensure that Bluetooth is enabled on the dongle.
• Turn on the glasses by pressing any button.
• To check if the connection is successful, adjust any setting in the glasses control panel. A green "Rx" LED indicator should briefly flash on the glasses.
Next, in the glasses control panel:
• Click "Set to Default" to apply default settings.
• Then slowly adjust the "Offset" slider until a clear 3D image appears.
• Use the remaining controls to fine-tune the image for the best possible quality.
If the device becomes unresponsive or settings behave unexpectedly, press "Device Reset" or click "Set to Default" again.
For further assistance, feel free to reach out by email or post your question in the IT support group on Facebook.
You can find the link to the group at the bottom of this page.
Customization
Due to the varying capabilities and performance of video hardware, it is difficult to determine the best glasses settings in advance. To achieve good image stability, select the filter parameters yourself based on the specifics of your computer. Open the glasses control panel and choose the connection type. In this example, we are using an S3D emitter connection.Emitter Settings
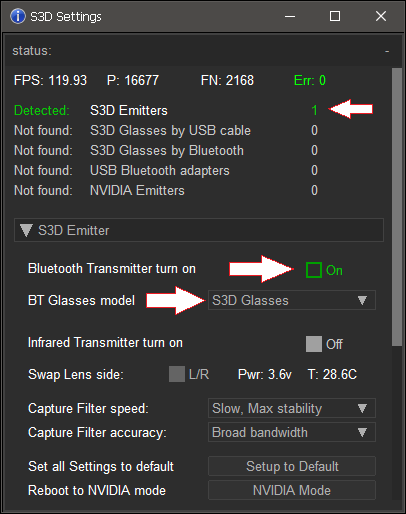
In the player's settings panel, you see the detected Emitter. Turn on the Bluetooth transceiver and set the glasses model. The Infrared Transmitter should preferably be disabled unless you additionally use IR sync glasses.
Glasses Settings
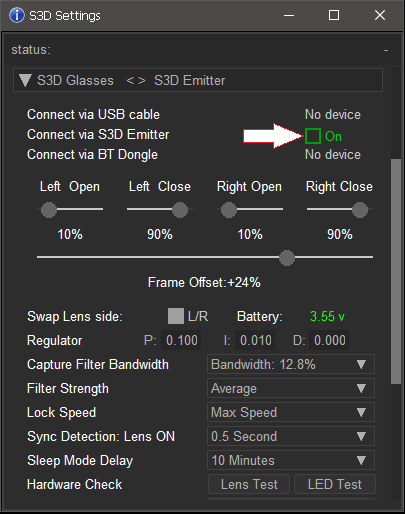
By manipulating this setting you can find the most stable picture possible. Unfortunately, at this time we have not finalized the memorization of settings for different modes. If you change the connection method, you need to adjust them. Usually, a single setting does not require any further changes.
Capture Filter Bandwidth
If your PC hardware is old and slow, rendering may cause delays and frame drops. To prevent hard image jitter, this filter ignores and discards deviations above the selected threshold. In the beginning to establish the broadest window.
Filter Strenght
Determines the smoothing level for dynamically calculating the instantaneous frame rate. The higher the smoothing, the slower the glasses respond to FPS changes on the computer.
Lock Speed
Limits the speed of score adjustments to fast FPS spikes. So that there is no loss of synchronization. If you set a very low response, the glasses may lose synchronization in case of significant FPS deviations.
Stability Regulator
The parameter P determines the degree of response of the glasses autotuning system to frame rate deviation. Larger values make the autotune faster, but do not set it too high, as oscillation will occur. Parameter I determines the accuracy of the auto-tuning. Parameter D significantly accelerates the exit to the point of optimal capture. But on old equipment if you have FPS jitter it is better do not to use it, and set to 0. Otherwise the system will not be able to adjust.
Reset to default settings
To restore factory settings, press the Reset to Default button. This will return all parameters to their initial state.

Firmware Update
The soft inside S3D Glasses are sufficiently complex and there are still
plenty of hidden bugs. We periodically find and fix them, and improve functionality.
You can download and change the new firmware file yourself.
Use the DFU updater application to fill file to device.
To update firmware do the following steps:
1. Disconnect the glasses from the computer
2. Close Player. Open DFU application
3. Connect the glasses to computer
4. Click the line with the device name
5. Select the firmware by the File button
6. Press the Prog button and wait for done
7. Launch new firmware by clicking Run
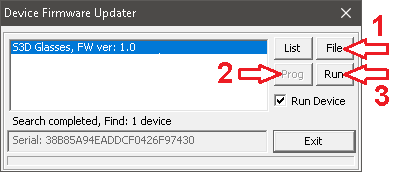
In rare cases, the firmware may program with an errors and the glasses hang up. The error may occur if you pull out the cable during programming. To exit from freeze and force jump to the update mode, press and hold the C buttons. If that doesn't work either, briefly short the battery with tweezers and then connect the USB power cable. To force the glasses into firmware update mode, turn them off using the "Power" button. Press and hold the "C" button, then briefly pressing the "Power" button.
For previously released glasses:
To upgrade to latest versions, which support new players. If your current firmware version is below v1.5, the first step is should install the Migration cleanup pack to clear memory from the old version. After that, install the latest firmware. New update will not be able to boot up without completing the cleanup memory first.
To update firmware do the following steps:
1. Disconnect the glasses from the computer
2. Close Player. Open DFU application
3. Connect the glasses to computer
4. Click the line with the device name
5. Select the firmware by the File button
6. Press the Prog button and wait for done
7. Launch new firmware by clicking Run
In rare cases, the firmware may program with an errors and the glasses hang up. The error may occur if you pull out the cable during programming. To exit from freeze and force jump to the update mode, press and hold the C buttons. If that doesn't work either, briefly short the battery with tweezers and then connect the USB power cable. To force the glasses into firmware update mode, turn them off using the "Power" button. Press and hold the "C" button, then briefly pressing the "Power" button.
For previously released glasses:
To upgrade to latest versions, which support new players. If your current firmware version is below v1.5, the first step is should install the Migration cleanup pack to clear memory from the old version. After that, install the latest firmware. New update will not be able to boot up without completing the cleanup memory first.

Downloads
Firmware update:
Glasses firmware
Migration cleanup
Video how to update
Windows driver:
S3D Glasses Windows driver
Driver installation guide
3D pictures:
3D demo pack, cross view
3D demo pack, parallel view
Update utility:
DFU App
Glasses firmware
Migration cleanup
Video how to update
Windows driver:
S3D Glasses Windows driver
Driver installation guide
3D pictures:
3D demo pack, cross view
3D demo pack, parallel view
Update utility:
DFU App
Homepage
Terms & Conditions
About Us
Privacy Policy
Business Info
Contacts
Payment
Shipping
Send Msg
Singapore 2026


