en
en
 Deutsch
 French
 Russian
 Spanish
 Portugues
 Japanese
 Korean
 Turkey
 Italy
Italy Poland
 Indonesia
 Arabic
 India
India Thailand
 Malaysia
 Filipino
 China
China Taiwan
 Vietnam
 Netherlands
 Sweden
 Norway
 Denmark
Integration with the NVIDIA stereo driver
Now it will be most difficult section. We're going add 3D galsses to NVIDIA Stereo driver for games. Before, you should test the S3D Player, adjust the display and glasses. Configure the emitter for the desired type of glasses, and only after that then start try playing games. This integration method should work on older graphics cards prior to the RTX30 series. We successfully use it on GeForce RTX2070 even today. If you use the method described below, you will have to roll back the video drivers quite a deep, and other programs may not like that.
NVIDIA officially discontinued support for the 3D Vision technology.
The last driver containing the 3D Vision package was version R418, which was supported until January 2020. After this version, NVIDIA stopped updating drivers with 3D Vision support. This means that all graphics cards newer than RTX20, including the RTX30 and newer series, do not support 3D Vision.
The last driver containing the 3D Vision package was version R418, which was supported until January 2020. After this version, NVIDIA stopped updating drivers with 3D Vision support. This means that all graphics cards newer than RTX20, including the RTX30 and newer series, do not support 3D Vision.
3D Vision End of Life
S3D Emitter Advantages
With S3D Emitter, you instantly gain broad compatibility with a wide range of 3D glasses from multiple manufacturers. Get up and running in under a minute - just plug the device into USB and tune. Our image stabilization and capture algorithms are continuously refined by our team. And an intuitive graphical control interface makes tuning your system fast and effortless.Switch the S3D-Emitter to NVIDIA mode
On the underside of the device, press and hold the last button for 1.. 2 seconds. The bright green LED light on the device will turn on. This indicates that the S3D-emitter has entered to NVIDIA hardware compatibility mode.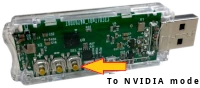
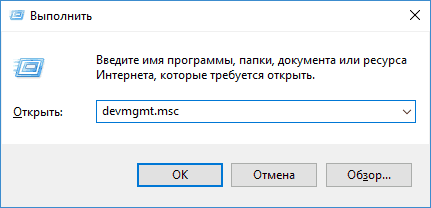
Check that the emitter is connected correctly. Open the 'Device Manager'. Press Win+R on your keyboard, the 'Run' window will open. Enter the line devmgmt.msc command and press Enter.
Make sure that the system has correctly installed the driver for the new mode. In the group: 'USB Controllers' try to find the device name in the list.
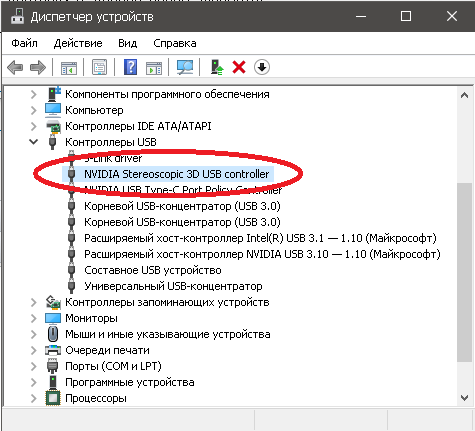
If "NVIDIA Stereoscopic 3D USB controller" is not listed there, you should install the driver only for NVIDIA Emitter:
NVIDIA 3D Controller driver
The same controller driver is also included in the complete NVIDIA 3D Vision driver package. To use NVIDIA 3D Vision, you must install the full driver package, which includes both the graphics drivers and the 3D Vision controller driver. Do not assume that installing only the 3D Vision controller driver is sufficient. It is used only for synchronization control.
You can install the complete driver package manually by downloading the latest version 425.31, which is the last release to support NVIDIA 3D Vision. The easiest method is to install the driver using the "3D Fix Manager" configuration utility.
Download from the developer's website "3D Fix Manager"
Go to the "Drivers" tab, where, following the program recommendations add all the necessary files. As a result, you should have a similar configuration, but with the names of your display and video card.
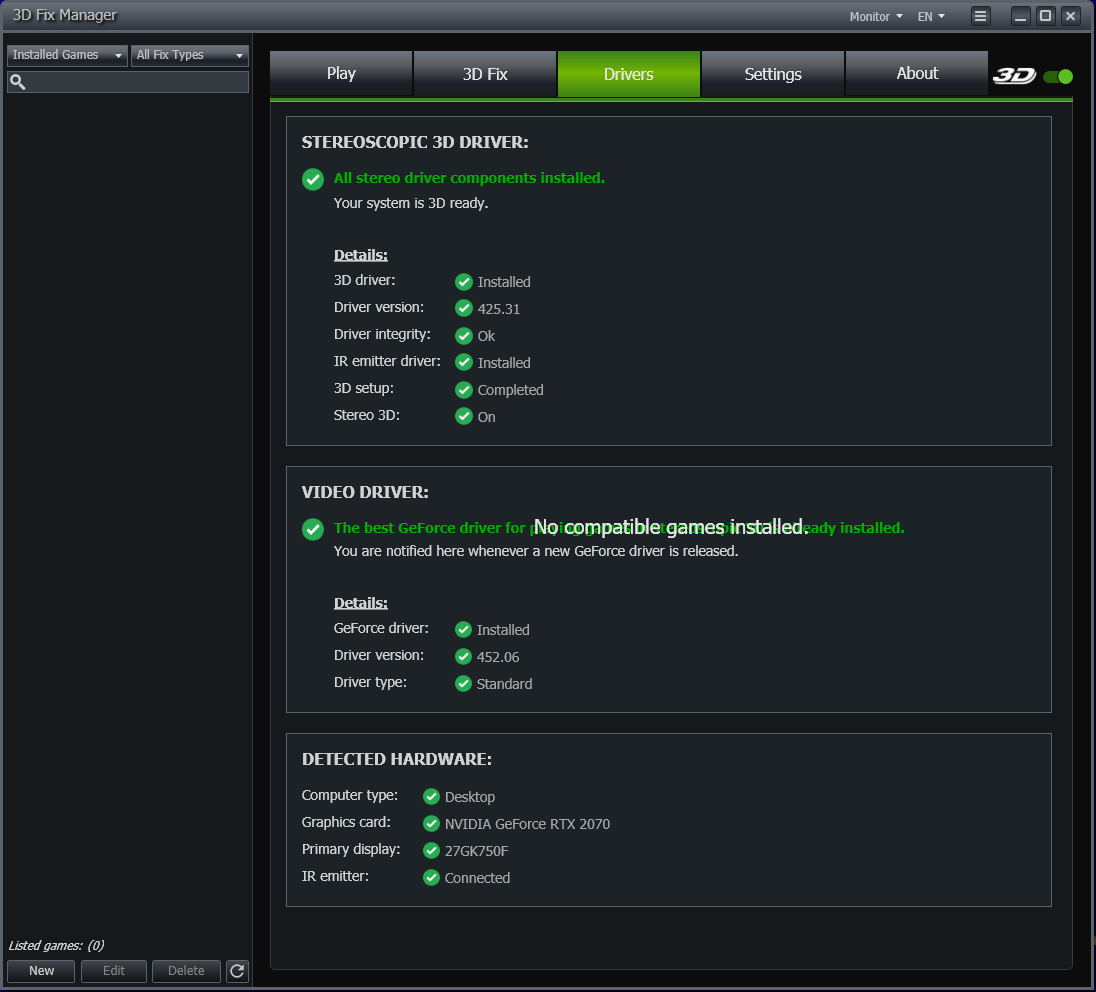
Carefully after installing the drivers.
If you have everything installed, configured and it works, do not install new updates from NVIDIA! The new versions will mess up and 3D will not work. The new driver will change the registry and '3D Fix Manager' won't be able to restore the configuration unless you manually uninstall everything and clean the registry. Then you will have to install the drivers from '3D Fix Manager' again.
Creating a display profile.
Next, create a virtual 3D display file, and add its profile (settings) to the existing one on your PC, so the NVIDIA driver thinks you are using 2nd, special 3D display. If this is not done, the driver will refuse to start.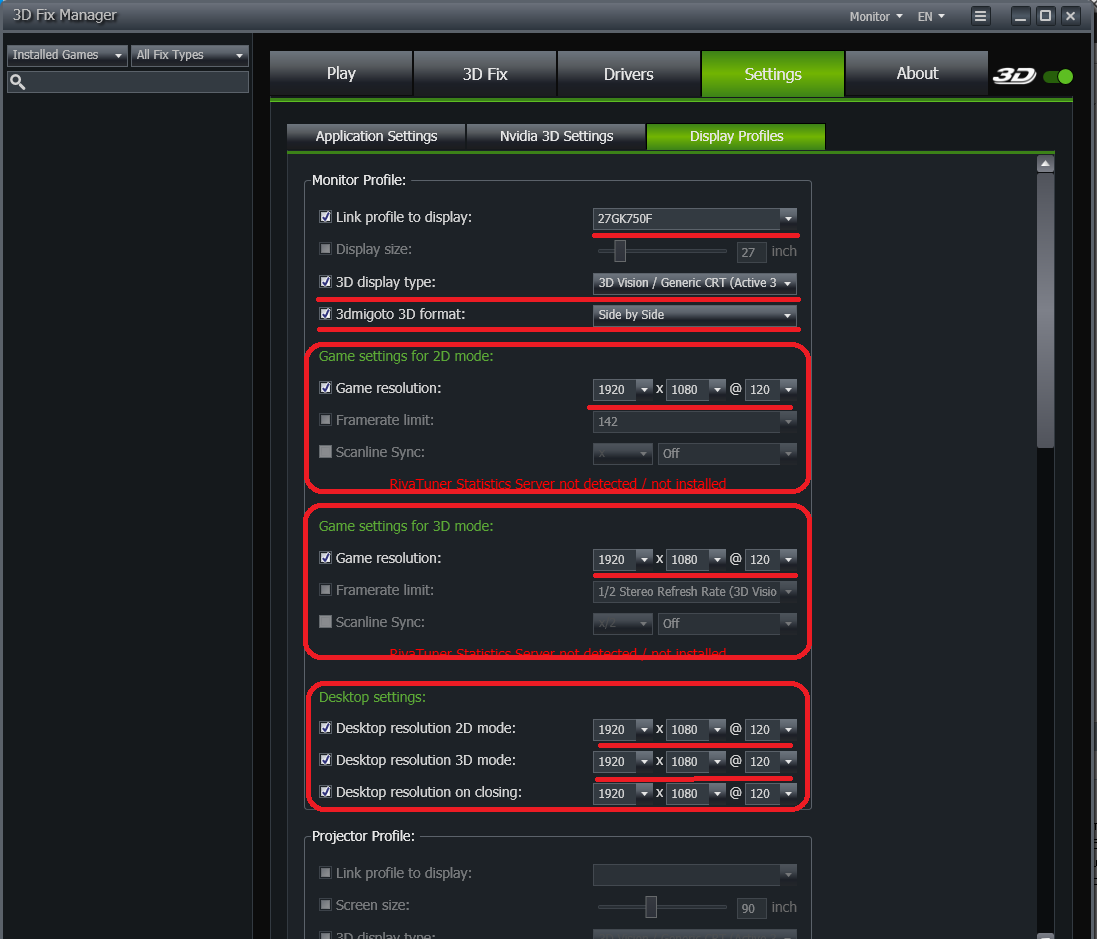
Go to the Settings -> Display Profiles tab, where you should fill in the settings. You need to define what screen resolution you want to use in different modes and what frame rate is acceptable. For the glasses to work properly, you should set something like 120Hz if the display if the display supports this. Allowable screen resolution and maximum operating fps check your hardware specifications. If your display is slow, you should not go for the maximum resolution, so that the picture "does not slow down". That's where the work with the "3D Fix Manager" program is finished and you can close it.
Turn on and activate the stereo driver
Now everything is ready to enable the NVidia Stereoscopic driver. Open from the Start menu or Display Properties -> "Nvidia Control Panel". In it appears the "Stereoscopic Display Type" selection box. Choose your previously created 3D virtual display (profile).Should choose a display to use each time before entering the 3D mode, because the interface has a bug and doesn't remember the setting. It will be cleared after turning off the power and the display selection is not shown in the control panel.
1. Open the "Nvidia Control Panel".
2. Selecting the profile: "Standard Analogue Display".
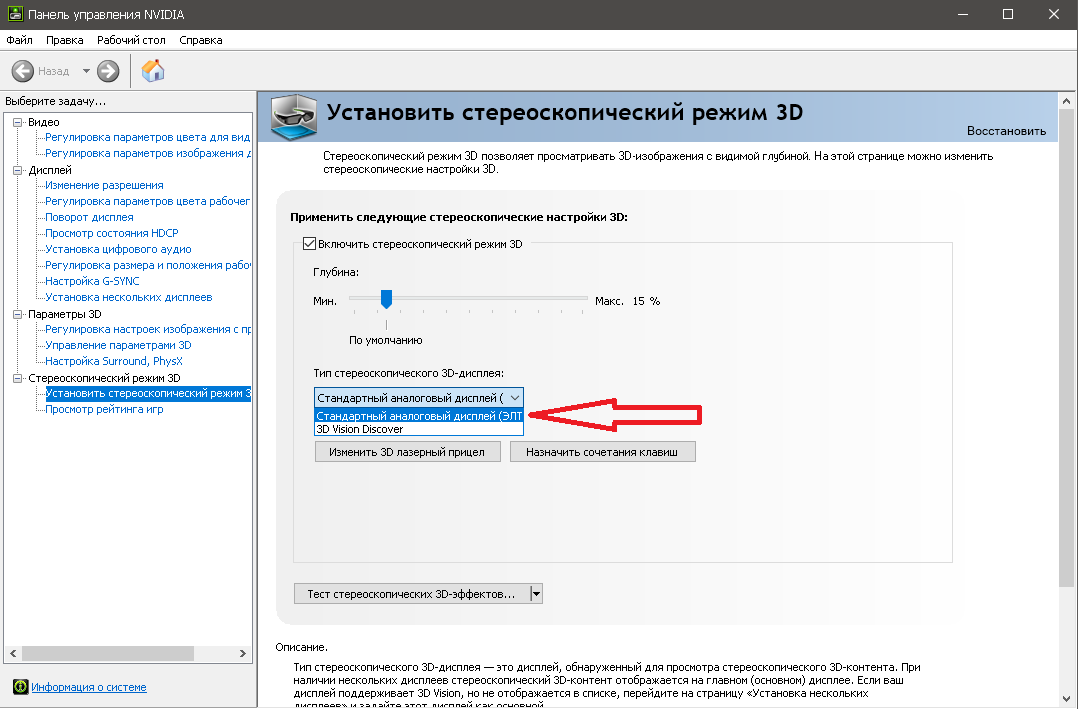
3. Next, run the "Setup Wizard" and configure the driver to work with the "Pyramid and glasses" set.
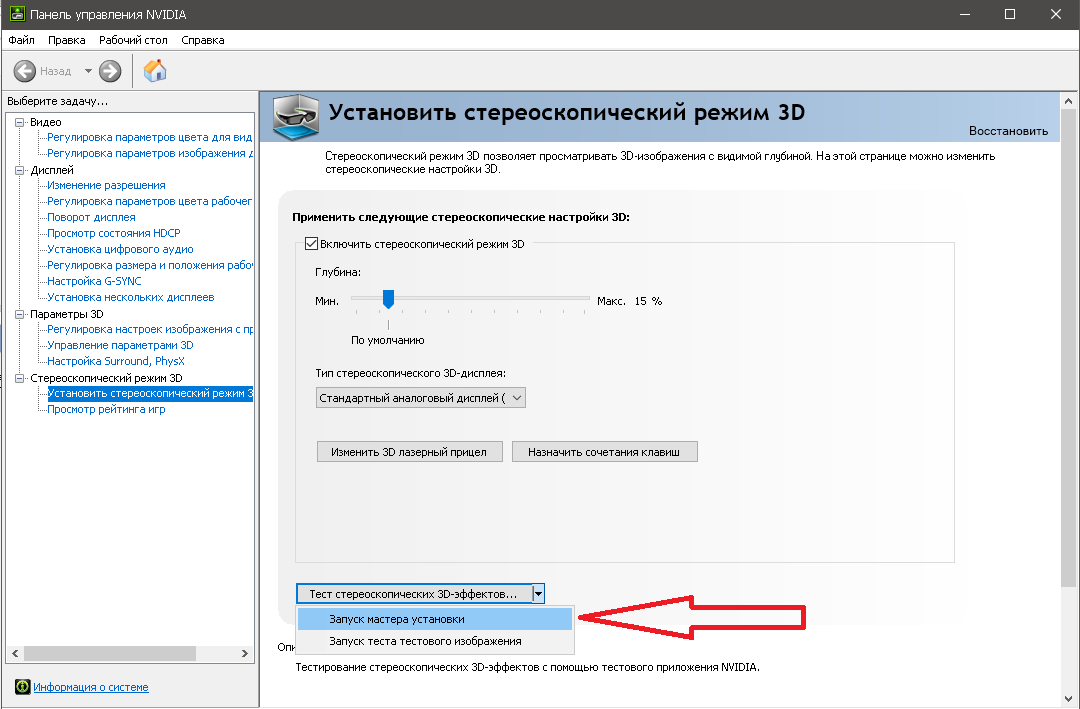
4. You can see the 'Run 3D stereo effects test' item.
5. Next, open the NVidia 3D player, everything should work.
Testing games
After successful completion of the "Setup Wizard" you can try to run the game. Press the "Assign keyboard shortcuts" button and see what commands you can stereo settings from the keyboard. Adjust the depth of the stereo base for eye comfort.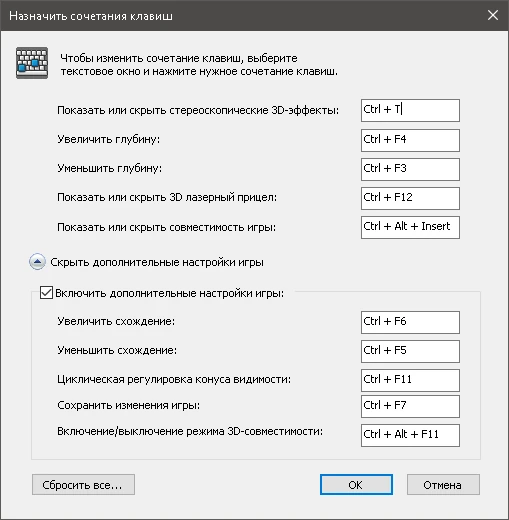
Next, you should look at the list of available games and read the hardware requirements.
List of compatible games Game List
Instructions for installing games Installation & Known Issues
The information in the article was rechecked in the summer of 2026, and the method worked on older graphics cards. That's the end of the story. For more information about adapting games read the dedicated forums. Have fun playing!
Homepage
Terms & Conditions
About Us
Privacy Policy
Business Info
Contacts
Payment
Shipping
Send Msg
 S3D
S3DSingapore 2026